Dip Dyes (sometimes known as Tip Dyes) were a big trend for Spring/Summer 2012 and with Autumn upon us they don't show any signs of going away!

This is good news for me because I love my pink hair but I know from experience that mastering the Dip Dye and making it last can be a little tricky! I'll admit now that I don't usually Dip Dye my hair myself! Instead I leave it to my lovely hairdresser Lisa, but over the months I've been sporting this look I've picked up a few tips and tricks that I thought I'd share with you!
To begin with you'll need...
A hairbrush, rat-tail comb, tinting brush, hair clips, tin foil, some old towels and the dye of your choice, I like La Riche Directions Semi-Permanent hair dye! They have a fantastic range of colours (below) and they contain no ammonia or any other harsh chemicals.
Each pot of directions hair dye has instructions printed on them - ignore them! Trust me, they don't work! Instead begin by giving your dry hair a good brush (it doesn't matter whether your hair is clean or dirty), then clip up any hair you don't want to dye (fringe/bangs etc.) and section your hair into to layers (around your head.)
Before you begin dying make sure to cover the area where you're sitting with an old towel as the dyes can stain, a towel around your shoulders is also a good idea! Take a small-ish section of hair and a piece of tin foil roughly 6"x 6.5" in size, I like to use a pin-curling clip to hold the hair and foil together.
Using a tinting brush, apply a generous amount of dye to the ends of the hair, I usually take the dye about 2" up. Fold the excess foil over the hair, making sure you make a well-sealed little packet. Repeat on the rest of your hair. Remember - if you have layers cut into your hair, you need to decide whether or not to dye your layers. If you'd rather not, you need to keep these layers clipped up.
Once you've finished applying the dye and you're rocking the roast chicken look, its time for my first insider tip -
Using a hairdryer, heat the tin foil packets for a minute or so to help the dye get going. Tip number two -
Leave the dye on your hair for at least two hours! The Directions instructions recommend leaving the dye on for 20 minutes but believe me this is no where near long enough and the colour will wash out in a few days! As I mentioned above, Directions dyes have no harsh chemicals so there's no problem leaving the dye on for a couple of hours or longer. Tip number three -
Use your hairdryer to heat the foil packets ever half and hour or so to help the dye along! When you're ready to wash off the dye take care to
use cool water and do not apply shampoo directly to the ends of your hair! Instead just shampoo the roots and crown of your head and let the shampoo wash down through your hair (you should continue to wash your hair like this between dyes)
Tip number four -
Dip dying can make your hair dry so invest in a good conditioner! I like Aussie 3 Minute Miracle Treatment and Herbal Essences Hello Hydration Conditioner, I also treat my hair to a Vo5 Hot Oil Treatment once a week. Finally -
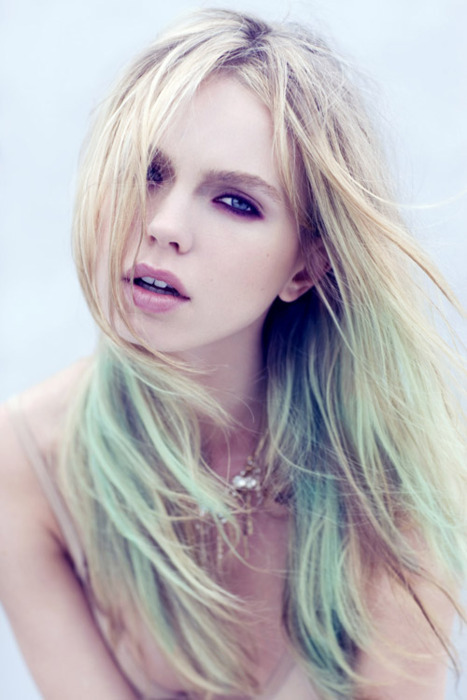
Blue-based dyes like the Lavender colour pictured here don't take so well as the red or yellow-based dyes so you will need to re-apply more frequently. I've tried both Flamingo (seen in the first, very posey photograph of yours truly) and Carnation Pink and can get a good 4-5 weeks out of my Dip Dye, bearing in mind that my hair is bleached. If you have darker hair, Directions do a range of pre-lightening kits!
And that's it! While I'm definitely not a beauty guru, I hope my little tips and tricks will help you to achieve a lovely, long-lasting dip dye! I'm loving experimenting with different colours! Dark Tulip is next on the agenda, a lovely deep purple/red, perfect for Autumn/Winter!
For Directions stockists visit http://www.lariche.co.uk/distributors
Stargazer also do a good range of dyes http://www.stargazer-products.com/category/?id=1
Xx